
Learn & Explore - Z Series
Nikon Z 7II and Z 6II


Dual EXPEED 6 Image-Processing Engines for Double the Creative Power
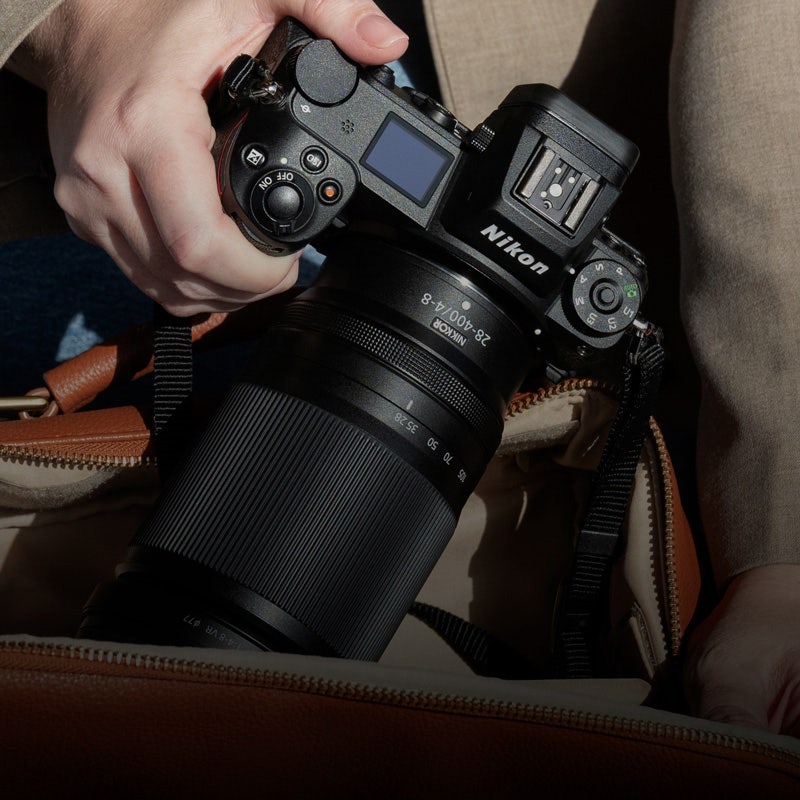
Nikon has released the Z 7II and Z 6II, the second generation of its first full-frame (FX-format) mirrorless cameras that made an impactful debut in 2018. One of the most prominent upgrades are the dual EXPEED 6 image-processing engines that enable faster response, contributing to improved continuous shooting, video, and AF performance. Learn more about these and other updates from the previous models in this article. (Report by: Koji Ueda)
Design & Function
Professional specifications: Support for battery grip and CFexpress cards
At first glance, the Z 7II and Z 6II look visually the same as their predecessors, the Z 7 and Z 6. However, the bodies are cast from a different metal mode, with various refinements made to the feel of the grip in the hand and other details. Dual card slots have been adopted, supporting CFexpress Type B, XQD, and SD (UHS-II) SD memory cards. An optional Power Battery Pack (vertical battery grip) is also available, made in response to popular demand, providing a more comfortable hold for those who take many vertical-oriented images, such as portrait photographers, and users of large, heavy lenses.
Controls and operations are the same as the Z 7 and Z 6, giving users a complete sense of familiarity when they shoot. Apart from the addition of new features, the menus are almost the same. Improvements to the EVF display refresh rate increases ease of viewing. Altogether, it is surprising just how much the ease of use seems to have improved.


Dual EXPEED 6 image processing-engines: A leap in processing capabilities
The cameras are equipped with not one but two highly acclaimed EXPEED 6 image-processing engine chips, significantly improving the camera’s responsiveness. You can experience the overwhelming increase in processing power for yourself with a faster burst shooting rate, swifter card writing speed, and other advancements*.


USB Type-C terminal: Supports USB power delivery


The USB Type-C terminal supports USB power delivery [1] from mobile battery [2], laptop or AC adapter, and is useful for interval shooting or long outdoor shoots.


Charging is supported on all EN-EL15 series batteries. USB power delivery is only possible with EN-EL15b/15c batteries.
Dual card slots for XQD or CFexpress Type B cards and SD cards
One card slot supports CFexpress Type B or XQD memory cards, while the other supports UHS-II SD cards. Native support for CFexpress Type B cards ensures the card’s optimum performance.


EVF: A brighter, clearer view than before
While the EVF resolution remains the same, interpolated live view frames are inserted into the EVF display when the camera is moved from side to side, ensuring a seamless EVF view during action shots.


MB-N11 Power Battery Pack: Providing an improved grip during vertical shooting
MB-N11 not only enhances your vertical shooting experience, it also improves stability when shooting with large lenses. It takes up to two batteries, prolonging battery life for extended shooting when you are out in the field. It also supports hot swapping, letting you change the batteries even when powered on, reducing downtime during fast-paced shoots. Charging is possible via the USB Type-C terminal.


Opening the battery cover reveals two switches. Pushing down the white switch lets you slide out the battery tray, which can take up to two batteries.


Pushing down the orange switch lets you take out just the outermost battery, allowing you to swap in a new one while leaving the camera powered on.


Shooting Function
Improved burst shooting and video performance; user-friendliness with users in mind
From my experience using the Z 7II and Z 6II, the AF finds and locks onto subjects very well. There seems to be improvements to the algorithm that have made the AF more accurate. AF reacquisition is seamless, and the excellent response can be felt even in Eye-Detection/Animal-Detection AF, which seem to track the subject’s eyes in real time.
The dual EXPEED 6 image-processing engines have not only sped up the burst shooting rate but also shortened the cooling time so that you can embark on your next series of burst shots almost immediately, making the entire shoot seamless and stress-free.
In the two years since the debut of the Nikon Z mirrorless camera system, the NIKKOR Z lens lineup has expanded tremendously, adding to the system’s sense of reliability. One of the strengths of the Z mount is its large 55mm mount diameter, which allows light to circulate to all corners of the image plane, ensuring that even fine details are well-rendered. Enhanced video capabilities increase the expressive possibilities available.
Point #1
High speed continuous shooting: 14 fps (Z 6II), 10 fps (Z 7II)
As a result of the faster continuous shooting speeds made possible by the dual EXPEED 6 image-processing engines, the Z 6II shoots at up to 14 frames per second (fps) with AF and AE tracking, and the Z 7II up to 10 fps. The Z 7II and Z 6II are also capable of almost 3 times more continuous shots before the buffer fills: around 124 frames for the Z 6II, and 77 frames for the Z 7II. The extremely fast processing speed for continuous shots means that almost no time is required for clearing the buffer—a powerful advantage.


Nikon Z 6II/ NIKKOR Z 14-30mm f/4 S/ FL: 16mm/ Manual exposure (f/4, 1/2000 sec, EV±0/ ISO 2500/ WB: Cloudy
© Kento Mori


Continuous shots of a dancer in action. There was no blackout during the impressive maximum 14 fps high speed continuous shooting speed, ensuring that the perfect moment was captured.


For the fastest possible continuous shooting speed, choose the Continuous H (extended) Release Mode.
Point #2
Slow shutter at up to 900 seconds (in M mode)
In manual exposure mode, you can set the shutter as slow as up to 900 seconds (15 minutes), simply by enabling the extended shutter speed function:
Step 1: Go to the Custom Setting menu.
Step 2: Select ‘d Shooting/display’.
Step 3: Select ‘d6 Extended shutter speeds (M)’.
Step 4: Select ‘On’.
Also found on the D780, this extended shutter speed setting is useful for astrophotographers and those who want to take long exposures. A countdown timer will indicate the remaining exposure time during the exposure.


Nikon Z 7II/ NIKKOR Z 24-70mm f/2.8 S/ FL: 24mm/ Manual exposure (f/14, 120 sec)/ ISO 64/ WB: Direct sunlight (M0.5)
Two neutral density (ND) filters (one ND1000 filter and one graduated ND filter) were used to significantly reduce the light in this 120-second long exposure. This provides an easy way to create a surreal image that you can never see with the naked eye.


Enable this setting by going to Custom setting menu → d6 Extended shutter speeds (M) → On.


This lets you set an exposure time of up to 900 seconds on the main command dial.
Point #3
In-camera 4K time-lapse movies
Traditionally, the interval timer shooting and time-lapse movie functions were separate, and it was necessary to choose either before shooting. However, on the Z 7II and Z 6II, the ‘Options’ menu in the interval timer shooting settings now includes the option to simultaneously record a time-lapse movie during interval timer shooting. All users have to do is to select the ‘Time-lapse movie’ option, choose the settings for the frame size and frame rate, and then the recording destination.


Nikon Z 7II/ NIKKOR Z 24-70mm f/2.8 S /FL: 24mm / Aperture-priority AE (f/8,1/50 sec, EV-0.3)/ ISO 100/ WB: Direct sunlight (M0.25)
I took 300 frames, setting the interval timer to take 1 shot every 2 seconds. Selecting the time-lapse movie option and choosing to shoot 30p at 2,160 pixels resulted in a movie with dynamic clouds.


You can choose the card slot to record your time-lapse movies to in the still shooting menu settings.
Point #4
Power saving mode
The Z 7II and Z 6II feature a new energy saving mode. Nikon cameras feature a Standby Timer: by default, after 30 seconds of inactivity, the Standby Timer will go off and put the camera to “sleep” unless the shutter button is half-pressed. However, if the energy saving mode is turned on, the shooting displays will dim and the camera will go into battery saving mode 15 seconds before the Standby Timer turns off and puts the camera to sleep. This reduces the energy consumed by the EVF and rear monitor, prolonging battery life.


Nikon Z 6II/ NIKKOR Z 85mm f/1.8 S /FL: 85mm / Aperture-priority AE (f/1.8,1/100 sec, EV-0.3)/ ISO 320/ WB: Direct sunlight
I shot from day to night on just 1 battery pack. Usually, you can get approximately 410 shots on one battery, but in energy saving mode, this number increased to around 450 shots (on the Z 6II, using the rear monitor).


In the Setup menu, go to ‘Energy saving (photo mode) and select ‘Enable’.


Point #5
Automatic eye sensor off when monitor is tilted out
On the Z 7 and Z 6, the eye sensor on the EVF is active even when the rear monitor is tilted out, which causes the monitor to black out when your hand or objects move too near the EVF during low angle or waist level shooting. On the Z 7II and Z 6II, the eye sensor automatically turns off when the rear monitor is tilted, providing a smoother experience when shooting from unusual angles.


Nikon Z 7II/ NIKKOR Z 14-30mm f/4 S /FL: 14mm / Aperture-priority AE (f/11, 1.6 sec, EV-0.7)/ ISO 64/ WB: Direct sunlight (G1.0)
A bridge in a forest that I shot from a low position. My feet were very near the eye sensor, but the display stayed on the rear monitor instead of switching to the EVF, allowing a smooth, stress-free shoot.
Point #6
Eye-Detection AF available even during Wide-area AF (L) modes
Improvements have been made to the user experience and accuracy of both Eye-Detection AF and Animal-Detection AF. Selecting these two modes previously required users to venture into the Custom Setting menu, but they now can be quickly and easily enabled/disabled via the i menu. Eye-Detection AF is now also supported in the Wide-area AF (L) modes, which allows users to limit the AF detection area.


Nikon Z 7II/ NIKKOR Z 50mm f/1.8S /FL: 50mm / Aperture-priority AE (f/1.8, 1/800 sec, EV+1.0)/ ISO 64/ WB: Direct sunlight
I snapped this picture of my pet dog while out on a walk. Being able to limit the AF area using Wide-area AF (L) while being supported by Animal-Detection AF helped me to achieve focus faster and more accurately.


The Eye-Detection AF and Animal-Detection AF modes have been added to the Auto-area AF and Wide-area AF (L) modes.


If you assign the Fn1 button, located near the lens mount, to change the AF area mode, you can switch between Eye-Detection AF and Animal-Detection AF by turning the sub-command dial as you hold down the Fn1 button.


Point #7
Ability to turn off onscreen information display to see the composition better
On the Z 7 and Z 6, when shooting with the rear monitor, the shooting information display at the bottom of the screen would overlap with the image, making it difficult to check the finer details of the composition. On the Z 7II and Z 6II, you can assign a button to toggle the live view information display on and off in the ‘Controls’ → ‘Custom controls’ menu. By default, this action is assigned to the movie record button. Press it, and all information except the focus point will be hidden.


Nikon Z 7II/ NIKKOR Z 24-70mm f/2.8 S /FL: 49mm / Aperture-priority AE (f/2.8,1/500 sec, EV0.3)/ ISO 100/ WB: Natural light auto
A swing by the seaside that is full of character. I framed the image so that the swing and its surrounding details went almost all the way to the bottom edge. Turning off the live view information display allowed me to check the composition thoroughly before I shot.
Point #8
Fixing the focus position even when the camera is powered off
Some subjects such as landscapes might require the photographer to set up, fix the composition and focus, and then sit and wait for the perfect timing, powering off the camera to conserve battery power. However, on many mirrorless cameras, turning the camera off will cause the focus position to reset, and the photographer would have to adjust it back. Turning on the “Save focus position” function ensures that the focus position will stay where it was before the camera was powered off, allowing photographers to respond to the scene without wasting precious moments.


Nikon Z 7II/ NIKKOR Z 70-200mm f/2.8 VR S/ FL: 84mm / Aperture-priority AE (f/2.8,1/500 sec, EV+0.7)/ ISO 100/ WB: Natural light auto
For this shot, I fixed the composition first and then waited for the boat to enter the frame, pre-focusing on the tree on the right side of the image. Although the camera was powered off until the boat appeared, the focus position stayed on the tree where I had placed it, allowing me to capture the perfect moment.


In the Setup menu, go to ‘Save focus position’ and select ‘On’.
Point #9
4K 60p movies with Eye-Detection AF
The video shooting features on the Z 7II and Z 6II have evolved too. For one, Eye-Detection AF and Animal-Detection AF are now supported during movie shooting, helping to keep the focus on human and animal subjects in video, too. Besides support for external recording in N-Log and ProRes RAW (can be enabled by a Nikon-authorised service centre for a fee) via the Atomos Ninja V external recorder, external recording in Hybrid Log Gamma (HLG) is also possible. In other words, you can record footage that contains a wide dynamic range and colour gamut, and display them on a HLG-ready display right after you shoot, without the need for advanced editing.


Nikon Z 7II/ NIKKOR Z 70-200mm f/2.8 VR S/ 4K 60p/ HDR (HLG)
Model: Yuji Takadori
A backlit video scene with a human subject, shot using Eye-Detection AF. The new support for HLG recording provides a wide dynamic range and colour gamut that is close to that of what the human eye sees.


4K recording is possible at up to 3,840×2,160(4K UHD), at a frame rate of up to 60p. The cameras are also capable of Full HD 120p recording and slow- motion recording.


You can set the external recording output options by going to Setup Menu → HDMI → Advanced menu. The camera supports output in both HDR (HLG) and N-Log.


Summing Up
Main draws: Improved performance; the Z system’s excellent image quality
I own two Z 6 cameras and one Z 7, using them for a wide variety of purposes that include work as well as my own personal projects. They are sufficient, but I also do feel that an upgrade would be more than worthwhile considering the improved performance and reliability of the Z 7II and Z 6II, found in features such as the dual card slots and dual EXPEED 6 image-processing engines.
If you are an existing Z series user wondering if you should upgrade, I would advise you to consider how much the improvements and new features on these second-generation Z series cameras appeals to your personal shooting style. For example, if high-speed continuous shooting is important to you, the burst shooting rate and response on the Z 7II and Z 6II are significantly better than on their predecessors, so an upgrade would certainly be beneficial.
Existing users of DSLR cameras such as the D750 and D850 should also be sufficiently satisfied with the Z 7II and Z 6II, which are more complete than their predecessors were. There are more Z mount lenses than there were two years ago, and it is delightful to experience the excellent image quality possible because of the Z mount’s larger mount diameter. Existing lens assets can still be used via the Mount Adapter FTZ. With all these in mind, the improved Z series is definitely worth a try.
Specs comparison
| Z 7II / Z 6II | Z 7 / Z 6 | |
|---|---|---|
| Effective pixels | Z 7II: 45.7 megapixels Z 6II: 24.5 megapixels |
Z 7: 45.7 megapixels Z 6: 24.5 megapixels |
| Image processing engine | EXPEED 6×2 | EXPEED 6×1 |
| Camera on-board VR | 5-axis image sensor shift | 5-axis image sensor shift |
| Media | CFexpress Type B or XQD×1 ; SD (UHS-II)×1 | CFexpress Type B (adapted to XQD) or XQD×1 |
| EVF | 0.5-inch, OLED, approx. 3.69 million dots, approx. 0.8x magnification | 0.5-inch, OLED, approx. 3.69 million dots, approx. 0.8x magnification |
| Rear monitor | 3.2-inches, TFT, approx. 2.1 million dots, touch panel, tilting | 3.2-inches, TFT, approx. 2.1 million dots, touch panel, tilting |
| Shutter | Mechanical, electronic front-curtain, electronic | Mechanical, electronic front-curtain, electronic |
| Shutter speed | 1/8,000 to 30 s (extendable to 900 s in mode M), Bulb, time, X200 | 1/8,000 to 30 s, Bulb, time, X200 |
| Burst shooting speed | Z 7II: up to 10 fps Z 6II: up to 14 fps |
Z 7: up to 9 fps Z 6: up to 12 fps |
| ISO sensitivity | Z 7II: ISO 64 to 25600 (expandable to ISO 32 to 102400) Z 6II: ISO 100 to 51200 (expandable to ISO 50 to 204800) |
Z 7: ISO 64 to 25600 (expandable to ISO 32 to 102400) Z 6: ISO 100 to 51200 (expandable to ISO 50 to 204800) |
| Low light AF detection range | Z 7II: -3EV (with low-light AF: -4EV) Z 6II: -4.5EV (with low-light AF: -6EV) |
Z 7: -2EV (with low-light AF: -4EV) Z 6: -3.5EV (with low-light AF: -6EV) |
| AF area modes | Pinpoint AF, single-point AF, dynamic-area AF, wide-area AF (S), wide-area AF (L), wide-area AF (L-people), wide-area AF (L-animals), auto-area AF, auto-area AF (people), auto-area AF (animals) | Pinpoint AF, single-point AF, dynamic-area AF, wide-area AF (S), wide-area AF (L), auto-area AF |
| Main movie frame rates | Z 7II:4K 60p, FHD 120p Z 6II: 4K 30p, FHD 120p |
4K 30p, FHD 120p |
| Movie output | N-Log, HDR (HLG) | N-Log |
| USB charging/ powering | Both supported | Charging only |
| Supplied batteries | EN-EL15c Rechargeable Li-ion Battery | EN-EL15b Rechargeable Li-ion Battery |
| No. of shots | Z 7II: approx. 380 shots Z 6II: approx. 400 shots (EVF shooting) |
Z 7: approx. 330 shots Z 6: approx. 310 shots (EVF shooting) |
| Dimensions (W × H × D) | approx. 134.0×100.5×69.5mm | approx. 134.0×100.5×67.5mm |
| Weight | approx. 705g | approx. 675g |
* Highlighted text indicates superior specs upon comparison.


Koji Ueda
Born in Hiroshima in 1982. He studied in San Francisco, USA, and produced works for TV programmes, commercials, short films, and so on. He developed an interest in portrait photography after purchasing a DSLR camera, and aimed to become a professional photographer. After returning to Japan he started working as a professional photographer. He currently contributes to digital camera magazines as well as other magazines and websites.

